
If you’ve ever spent a day exploring a hidden creek, hopping between lakeside beaches, or navigating a scenic stretch of coastline in your dinghy, you’ve already done the hard part.
Now, the RYA wants to help you share that magic with the rest of the sailing community.
The RYA Dinghy Trails programme is all about opening up our waters. These trails are curated experiences that highlight slipways, points of interest, places to eat, and essential safety information.
The best trails come from you – the sailors who know these waters best. Here is how you can get involved and put your favourite local spot on the map.
The trails on this site are created and updated by volunteers, and we want to help you create a dinghy trail of your own.
Is someone already working on the trail you have in mind?
Before beginning the work of gathering the data for a dinghy trail, please contact the site editors to make sure that someone else hasn’t already started creating the trail that you’re considering. Once we know that you are creating a trail, we will assign someone to work with you, help, and answer any questions you may have.
Please also join the Dinghy Trails FaceBook group if you are happy to do so.
1. Scout your route
A great trail is more than just a line from A to B. When choosing a trail, consider what makes it special. Does it have a historic lighthouse? A perfect spot for a picnic? A reliable pub with a jetty? A welcoming sailing club?
Key ingredients for a trail include:
- Accessibility: A clear starting point with a public slipway or access via a club slipway (with any booking or payment requirements)
- Distance: Ideally between five and ten miles (suitable for a half or full day of sailing)
- Amenities: Toilets, cafes, and places to tie up safely
2. Gather the knowledge
Once you have a route in mind, it’s time to play “local expert.” The RYA provides a standardised template to ensure all trails are easy to follow. You’ll need to note:
- Launch and recovery: Details on tide times, trailer parking, and any fees
- Waypoints: Specific GPS coordinates or visual landmarks (e.g., “The red buoy off the spit”)
- Safety hazards: Notable currents, sandbars, or busy shipping lanes to avoid
3. Capture the vibe
People sail with their eyes first! Take high-quality photos of the scenery, the launch point, and any tricky navigation markers. If you have a GPS tracking app (like Strava or a dedicated marine plotter), record your track to help us design the official map.
4. Submit your trail
The RYA team is eager to work with individuals and clubs. You don’t need to be a professional cartographer; you just need the data. You can reach out to the RYA Dinghy Trails team to submit your idea/proposal and they will help verify the safety details and polish the layout into the official RYA Dinghy Trail format.
Why get involved?
By creating a trail, you’re helping to grow the sport. You’re giving a less confident sailor the knowledge to explore somewhere new, and helping local coastal communities thrive. Plus, there’s a certain pride in seeing your local patch featured on a national platform.
Top Tip: The best trails include ‘Plan B’ options. If the wind picks up or the crew gets tired, note down places where a dinghy can safely beach or find shelter early.
Gather the Information in the format that we need
- Gather your source material. That could be an existing dinghy trail extension, or it could be the information for a new dinghy trail.
- Decide what the name of your dinghy trail should be, and start a separate document in Word, Pages or an online sharable document.
- Identify the correct page template:
- Copy the content from the correct template and paste it onto your empty document. One of the advantages of using a template is that it reminds us of the essential information, and if you have some gaps please work with us, as others may be able to fill the gaps in.
- Add the text content as suggested by the template.
Create the Map
- Go to OpenSeaMap. This should open a map that takes up the whole browser.
- Navigate to the location that you are planning to create a map of, and zoom so that the whole trail is in one map
- Have a list of the things that you want to write as accompanying text for the trail map, so that you can design the trail to match your writing. The words for the example below are:
- Start from Elmore Road Slipway
- Aim directly for the Bramble Bank
- Cross the shipping lane at 90 degrees only when it is clear to do so. Wait for the channel to clear of big ships.
- Head parallel to the coast.
- Keep to the deep water side of Lepe Buoy and then aim for the beach at Lepe.
- Note that it is a tremendously shelving beach and do not let your dinghy dry out or you may have to carry it 200m to get to the water on an ebb tide.
- View –> Turn off Coordinate Grid
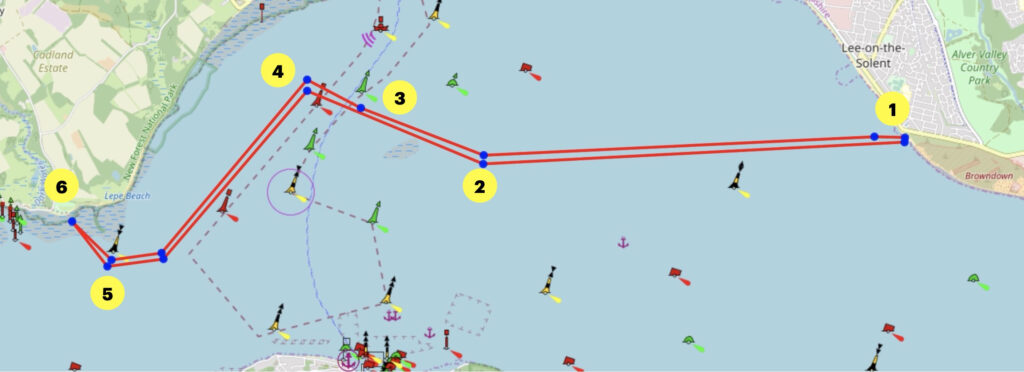
- Tools –> Trip Planner and your page should look like the image below.
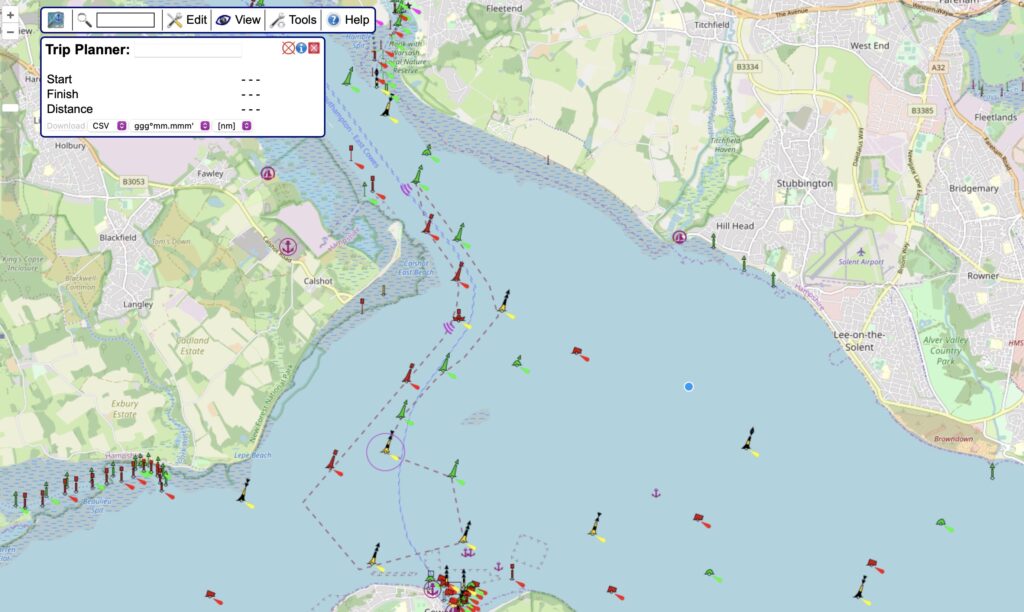
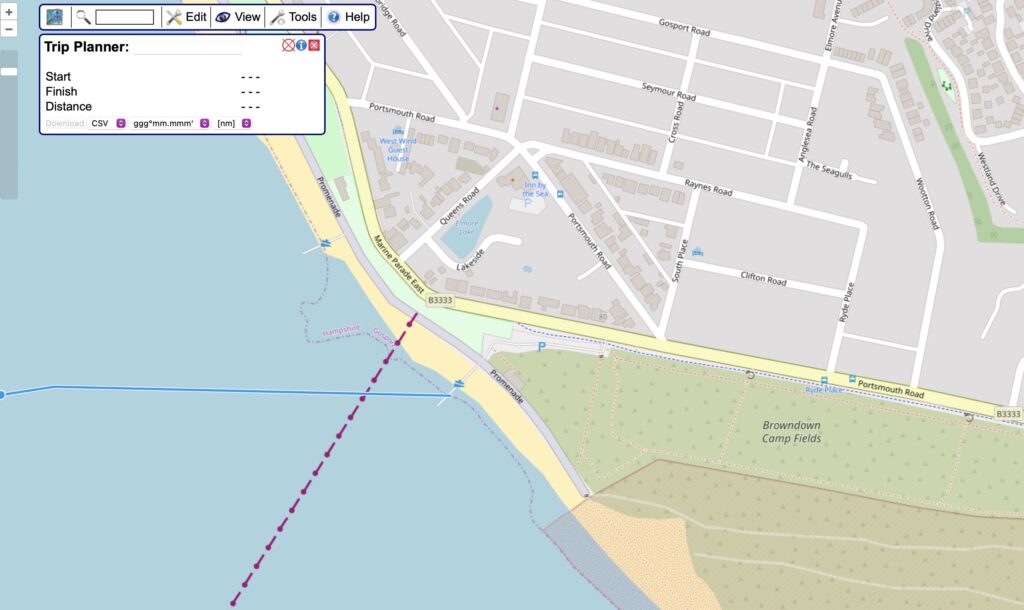
- Within this you can zoom in, and begin to draw your route as waypoints, as you can see where this trail is starting at a public slipway. The page can then be zoomed out and the track can be plotted. This is an activity which can be done only in one go.
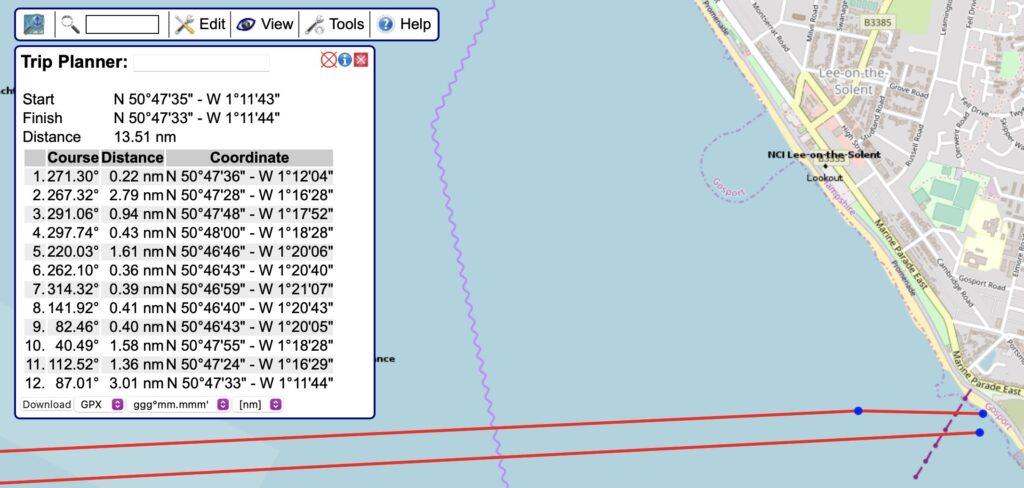
- Play around with the route plotter – it is much easier to use than it first seems. Plot your track roughly first, so that the track runs from the start to the finish, and then double click to complete the track. Then all the points are moveable, and by clicking within a straight line another edit point appears, so that it’s possible to refine the track, including switching the aerial photo view on to get real precision.
- When you are happy that the route is correct, immediately download the GPX file, change “CSV” to “GPX” and click on “Download”
- Change the name of the .gpx file to make the name relate to the trail.
- Zoom out and take an image snapshot of the whole trail. Take your time with this as this is the “photograph” that will be published.
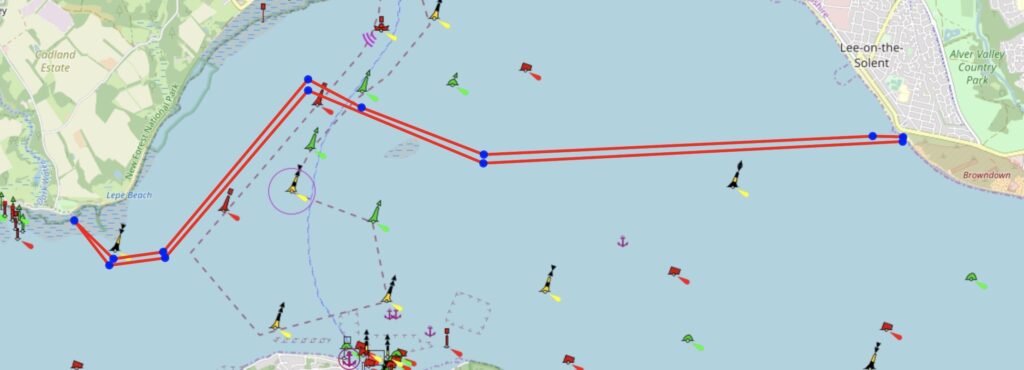
- Copy your image into PowerPoint or Keynote, and annotate the trail. Take a snapshot of that image, and making sure that it’s a .jpg file, and keep that separate. The keynote template and the PowerPoint template are provided below.
Note: Apple might attempt to be helpful and save the file as proprietary Apple image format instead of as a jpg, which will upload and look lovely on a Mac, but will be unreadable on a Windows machine. If this happens you can tell by opening the image in a separate tab and seeing the file suffix.
- You should now have the following files ready to send to the Site Editor who will create the dinghy trail web page:
- Document(s) with the completed template(s)
- .gpx file of the trail
- .jpg image of the trail map
- PowerPoint or keynote file of your annotated image
- The dinghy trail will usually require some refining, and we will do this with you.
Note: If you find that you need additional help once you start, please don’t struggle. Please contact your assigned helper so they can work with you to get knowledge gathered and formatted nicely.