

How to create a dinghy trail in the wordpress format.
If there is one possible dinghy trail from a given location, then put the information for the launch location in the content of the dinghy trail.
If there are many possible dinghy trails from the same location, make a separate page for the Launch Location and the Dinghy Trial.
- Gather your source material. That could be an existing dinghy trail, or it could be the information for a new dinghy trail. If you want to know what sort of information to gather, see the Information Schema.
- Decide what the name of your dinghy trail should be, and start a new page in WordPress, give it the title.
- Paste the contents of the Information Schema into the empty page.
- Add the text content as suggested by the Information Schema.
How to create the map
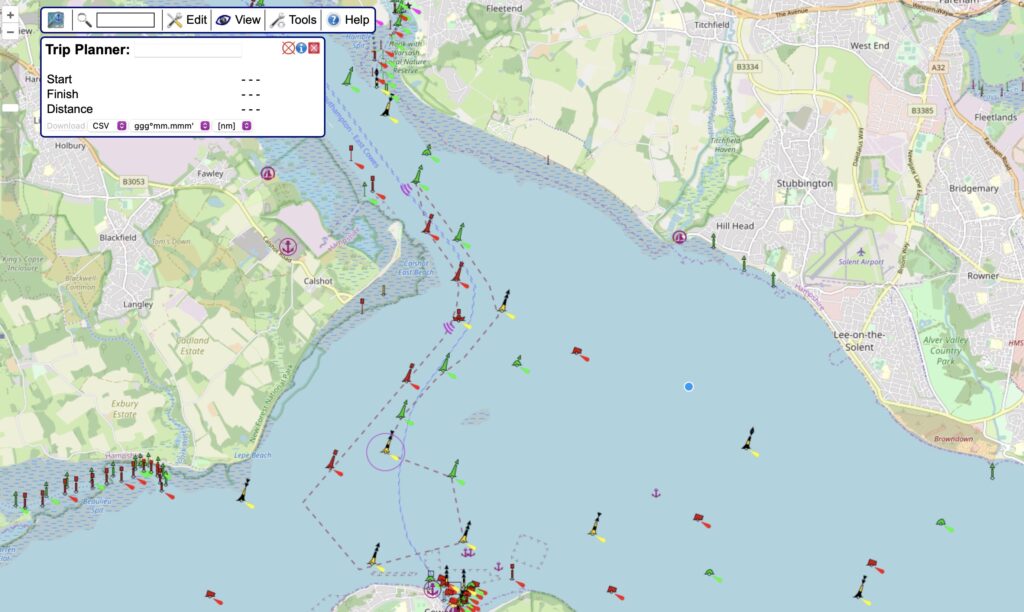
- Go to OpenSeaMap. This should open a map that takes up the whole browser.
- Navigate to the location that you are planning to create a map of, and zoom so that the whole trail is in one map
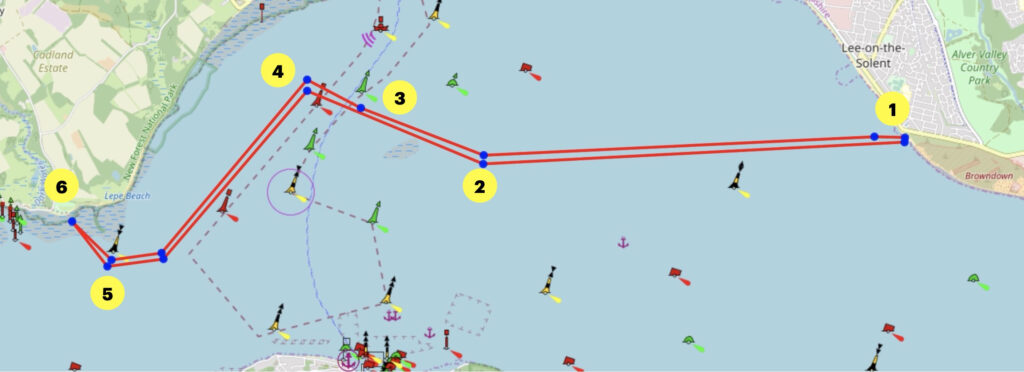
- Have a list of the things that you want to write as accompanying text for the trail map, so that you can design the trail to match your writing. For the example below the words are
- 1. Start from Elmore Road Slipway
- 2. Aim directly for the Bramble Bank
- 3. Cross the shipping lane at 90 degrees only when it is clear to do so. Wait for the channel to clear of big ships.
- 4. Head parallel to the coast.
- 5. Take Lepe Buoy to Port and then aim for the beach at Lepe.
- 6. Note that it is a tremendously shelving beach and do not let your dinghy dry out or you may have to carry it 200m to get to the water on an ebb tide.
- View –> Turn off Coordinate Grid
- Tools –> Trip Planner and your page should look like the image below.
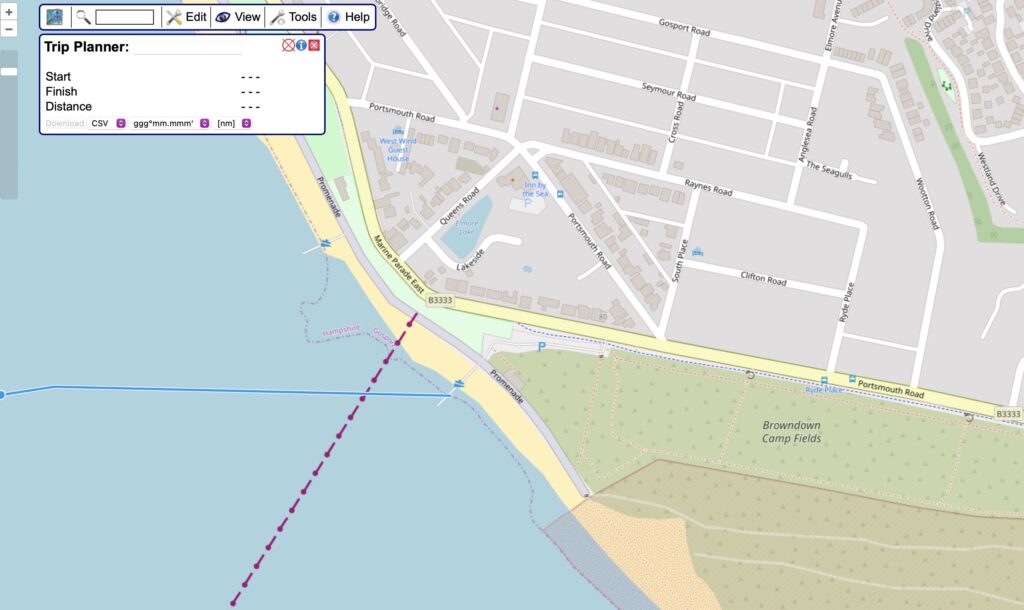
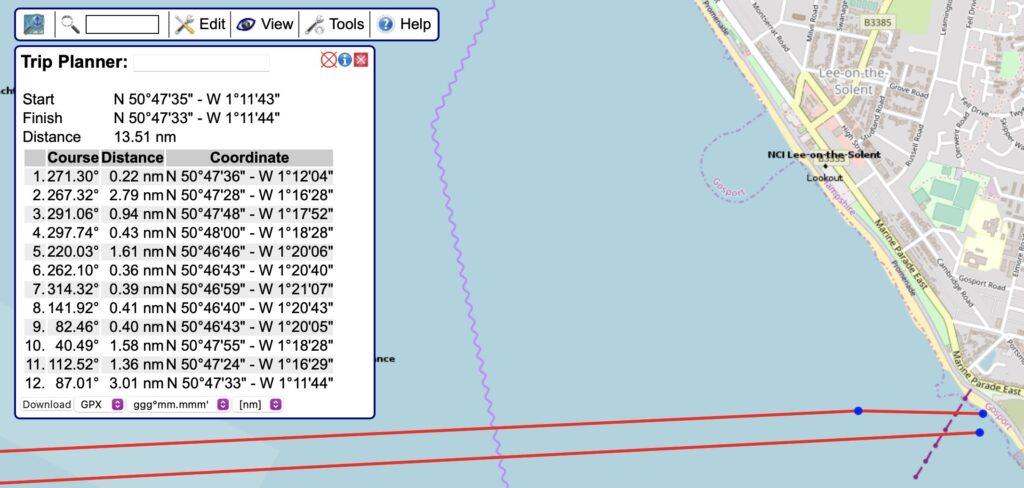
- Within this you can zoom in, and begin to draw your route as waypoints, as you can see where this trail is starting at a public slipway. The page can then be zoomed out and the track can be plotted. This is an activity which can be done only in one go.
Please play around with the route plotter – it is much easier to use than it first seems. Plot your track roughly first, so that the track runs from the start to the finish, and then double click to complete the track. Then all the points are moveable, and by clicking within a straight line another edit point appears, so that it’s possible to refine the track, including switching the aerial photo view on to get real precision.
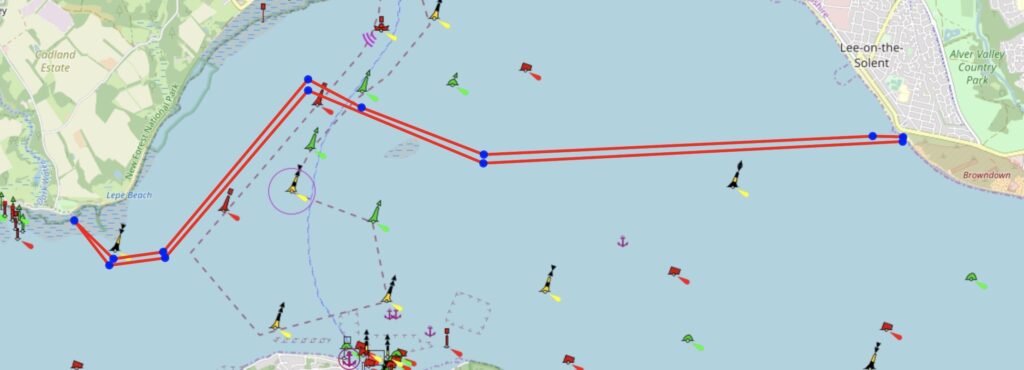
- Double click to end the trail. At this point the trail can be edited to be more accurate, and the map can be zoomed in. If a new edit point is needed, click on the red line.
- When you are happy that the route is correct, immediately download the GPX file, change “CSV” to “GPX” and click on “Download”
- Now zoom out and take an image snapshot of the whole trail.
Now copy your image into PowerPoint or Keynote, and annotate the trail. Take a snapshot of that image, and making sure that it’s a .jpg file, it can be uploaded to the wordpress page.
The keynote template and the powerpoint template are below.
Note that Apple might attempt to be helpful and save the file as not a jpg but as proprietary Apple image format, which will upload and look lovely on a Mac but will be unreadable on a Windows machine. If this happens you can tell by opening the image in a separate tab and seeing the file suffix.
This is now a map that ties in with the words and is suitable for use as a dinghy trail.
Change the name of the .gpx file to make the name relate to the trail. Upload the GPX file directly below the image as “File”
Add the wording for the use of openseamap to the comments for the image.
Permitted use of Openseamap under the “Creative Commons Attribution Share-Alike 2.0” license
This map is for information use only, not for navigation.
Complete the rest of the information and save the page.
Add the page to the menu using standard WordPress administration.